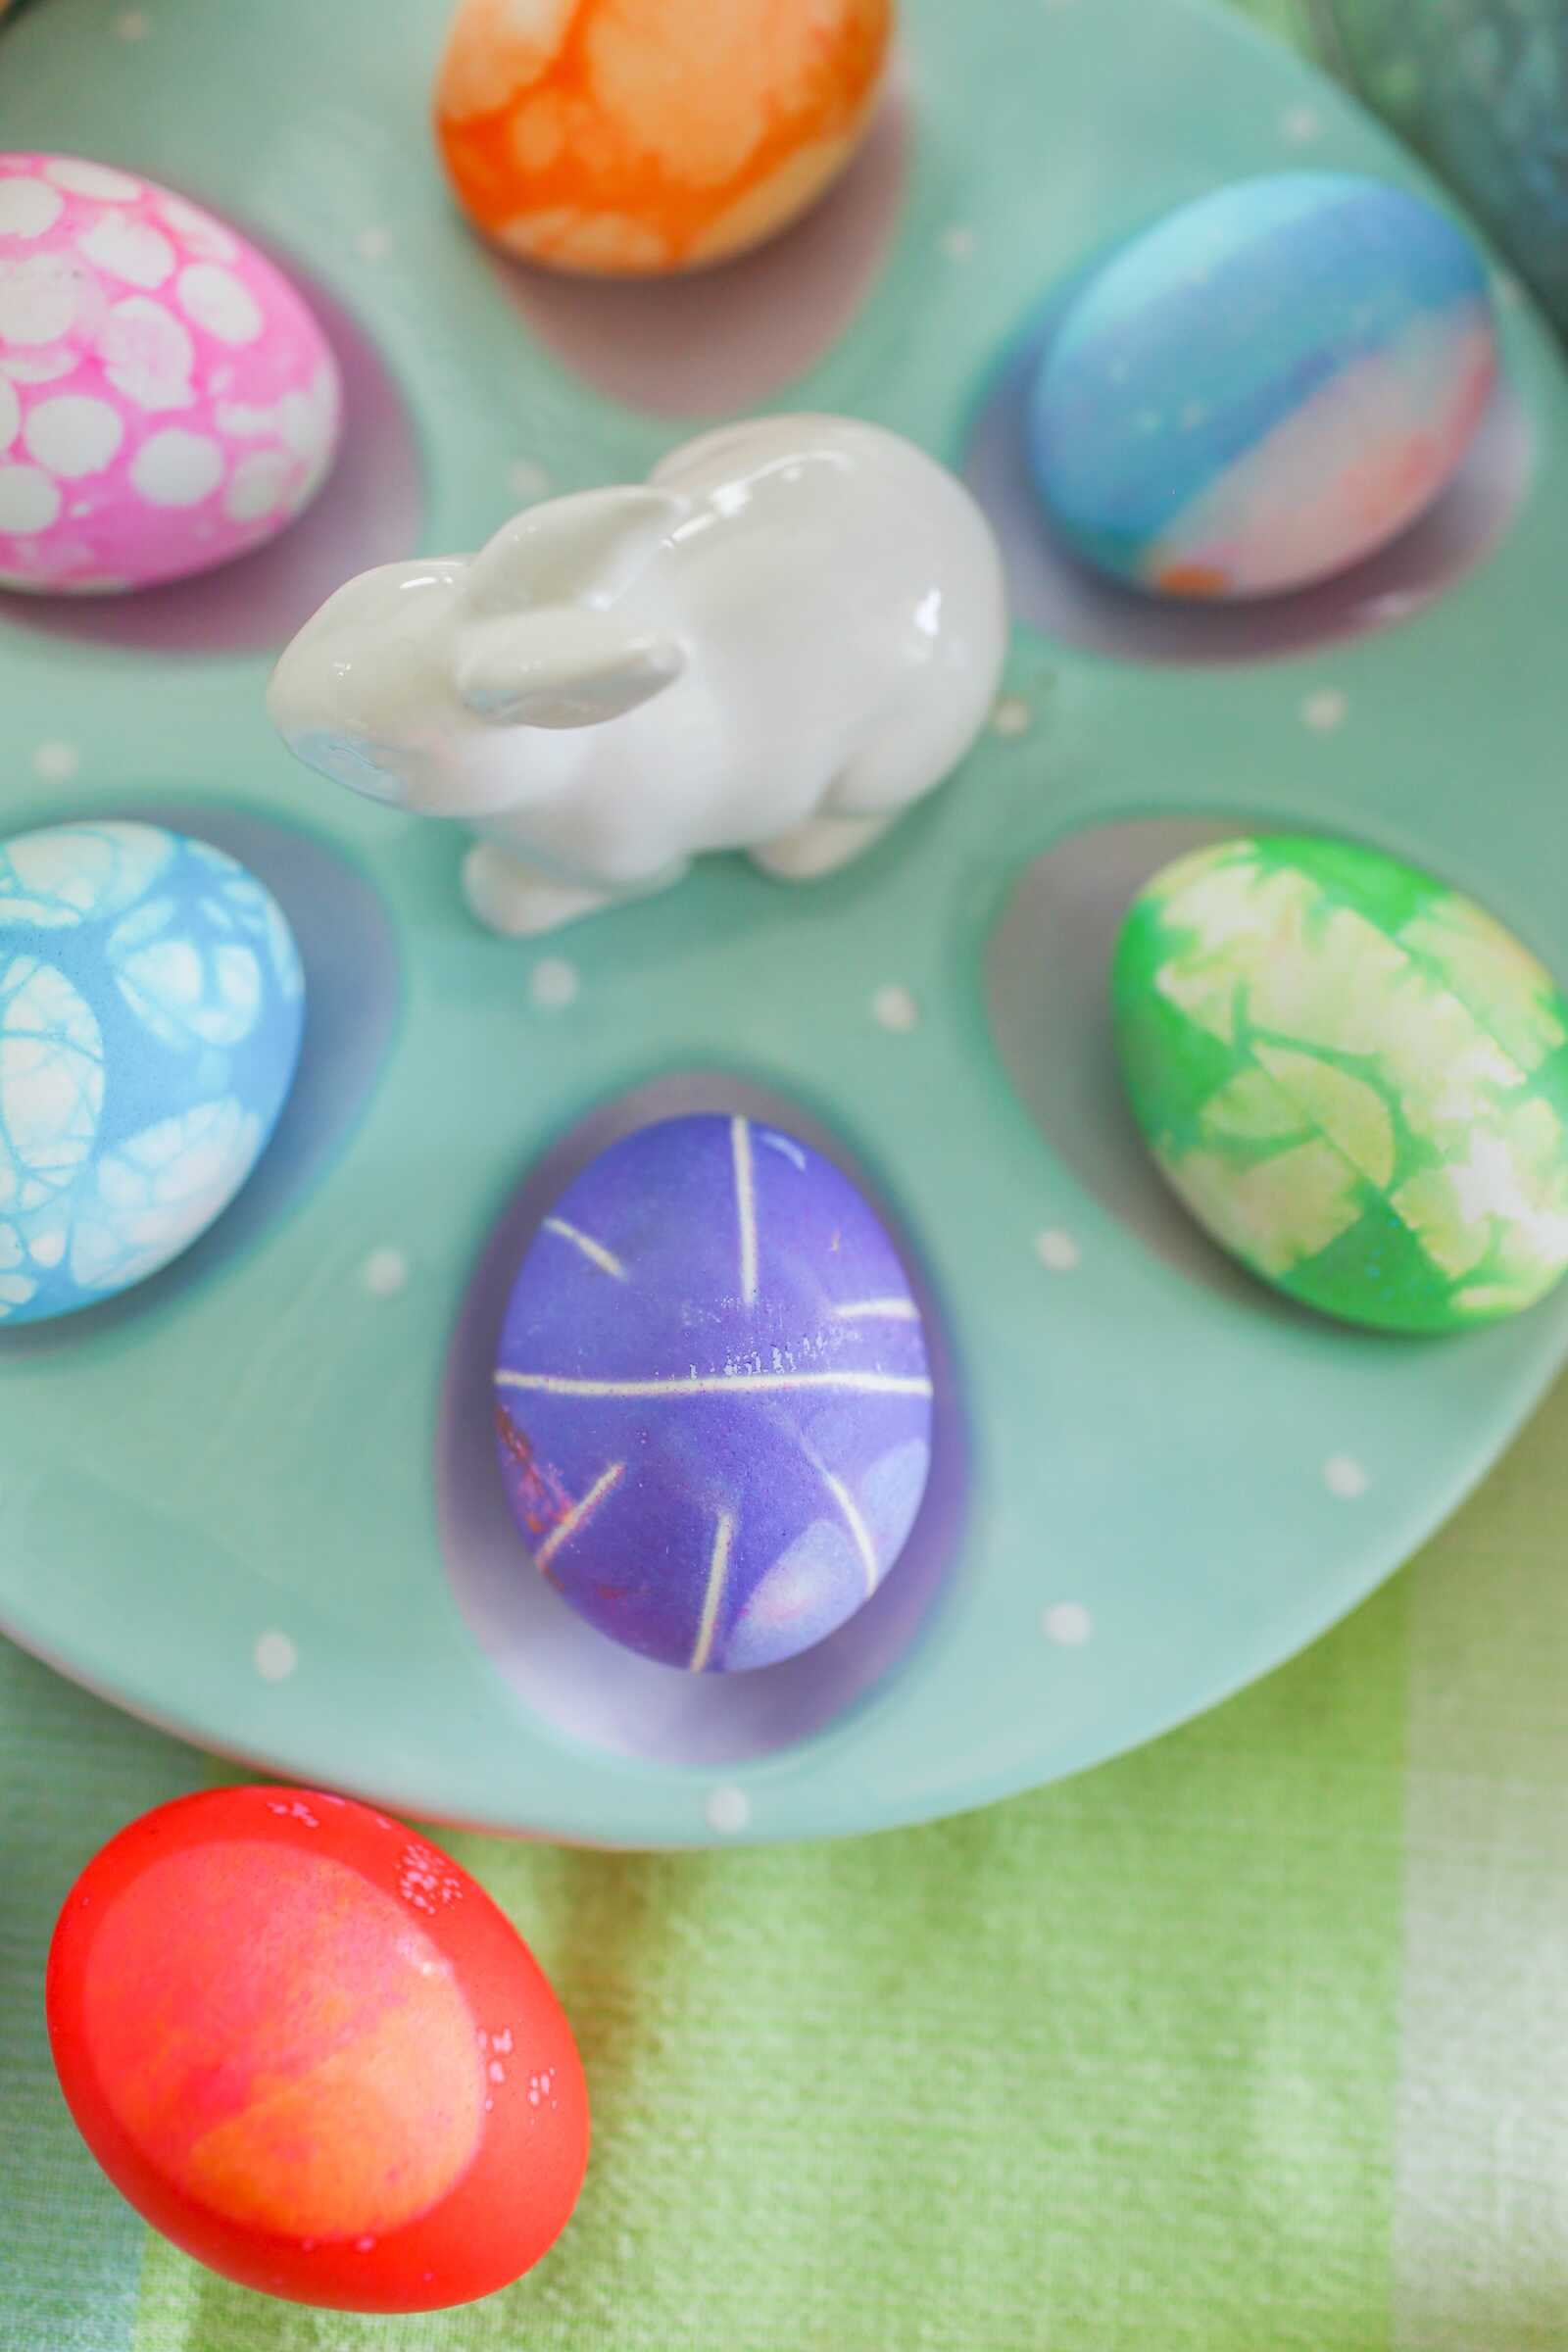
DIY Bubble Wrap Dyed Easter Eggs – A Fun Mosaic Effect


When it comes to decorating Easter eggs, I love finding new ways to make them stand out. This year, I experimented with bubble wrap—and the results were magical! By tightly wrapping eggs in bubble wrap and letting the dye seep into the cracks, you get a stunning mosaic effect. Depending on the size of the bubble wrap you use, you can create small, delicate circles or big, bold patterns. It’s a fun, slightly messy, and completely creative craft for the whole family.

Supplies You’ll Need
- Hard-boiled eggs (white shells work best for vibrant colors)
- Bubble wrap (small-bubble and large-bubble for different effects)
- Scissors
- Clear tape or rubber bands
- Egg dye (store-bought kits or homemade with food coloring, vinegar, and water)
- Small cups or bowls for dye
- Paper towels and a drying rack or old egg carton


Step-by-Step Instructions
Prepare Your Eggs
Hard boil your eggs ahead of time and let them cool completely. Make sure the shells are clean and dry before wrapping, otherwise the bubble wrap may not stick well.


Cut and Wrap the Bubble Wrap
Cut a piece of bubble wrap big enough to wrap around your egg. Place the egg in the middle, then wrap it snugly so the bubbles are pressed against the shell. Use clear tape or a rubber band to hold it in place. The tighter the wrap, the better the mosaic effect will be.


Dip into Dye
Place the wrapped egg into a cup of dye. Let it sit for a few minutes, turning occasionally so the color seeps evenly into the cracks between the bubbles. You’ll notice the dye creeping into the little crevices, creating that patchwork design.


Let the Dye Set Before Unwrapping
After dipping, place the egg on a drying rack or egg carton while it’s still wrapped in the bubble wrap. Leave it on for at least 20 minutes to let the dye set into the cracks and dry a little. Then, carefully peel off the bubble wrap for the big reveal. Place the unwrapped egg back on the rack to finish drying completely before handling.


Experiment with Colors
Try wrapping the same egg in bubble wrap twice—first with one color, then again with another. This layering technique can create multi-tone mosaic patterns. Using different sizes of bubble wrap will also give each egg its own unique personality.


Tips for Success
- Wear gloves if you don’t want colorful fingers—this project gets messy!
- Use bold colors for best contrast with the white of the shell.
- Save the bubble wrap and reuse it for multiple eggs—it still works even after being dyed.
- Kids love this craft! Just supervise younger ones with scissors and dye.


Final Thoughts
Bubble wrap dyed Easter eggs are an easy, affordable, and incredibly creative way to update your egg-decorating tradition. The mosaic effect makes them look almost like stained glass, and every egg comes out different. Whether you’re crafting with kids, hosting an Easter party, or just want to try something new, this technique is sure to impress.